
- Authors
- Written by :
Streamlining Web Apps: Serverless Deployment with AWS Amplify
- Published on
- Published On:
Introduction
AWS Amplify is a comprehensive suite of tools and services provided by Amazon Web Services that facilitates the development and deployment of scalable and secure web and mobile applications. It streamlines various aspects of the app development lifecycle, making it easier for developers to build and manage full-stack applications.
Key Features of AWS Amplify
- Frontend Frameworks Integration: Amplify supports popular frontend frameworks such as React, Angular, Vue.js, and mobile frameworks like React Native and Ionic.
- Hosting and Deployment: Amplify provides a fully managed hosting service for web applications, supporting features like continuous integration and continuous deployment (CI/CD) directly from source control repositories like GitHub, GitLab, and Bitbucket.
- Authentication and Authorization: Using Amplify, you can easily add authentication and authorization to your application with AWS Cognito, supporting user sign-up, sign-in, and access control.
- API Integration: Amplify simplifies API integration by providing built-in support for GraphQL through AWS AppSync and REST APIs.
- Extensible CLI: The Amplify CLI (Command Line Interface) allows developers to configure and manage backend services directly from the terminal, making it easier to integrate these services into their workflow.
Steps to deploy ReactJs application on amplify
Prerequisites
- A React application hosted on a GitHub repository.
- An AWS account with access to Amazon Amplify.
Step 1: Set Up Your React Application
- Create a React App: If you don’t have a React application yet, create one using Create React App
npx create-react-app test-react-app
cd test-react-app
- Commit to Github: Commit your React application code to a Github repository.
git init
git add .
git commit -m "Initial commit"
git remote add origin <your-github-repo-url>
git push -u origin master
Step 2: Set Up Amazon Amplify
Open the AWS Management Console and navigate to the Amplify service by selecting it from the list of available services.
Once you are on the Amplify service page, click the “Get Started” button located under the “Deploy” section to initiate the deployment process.
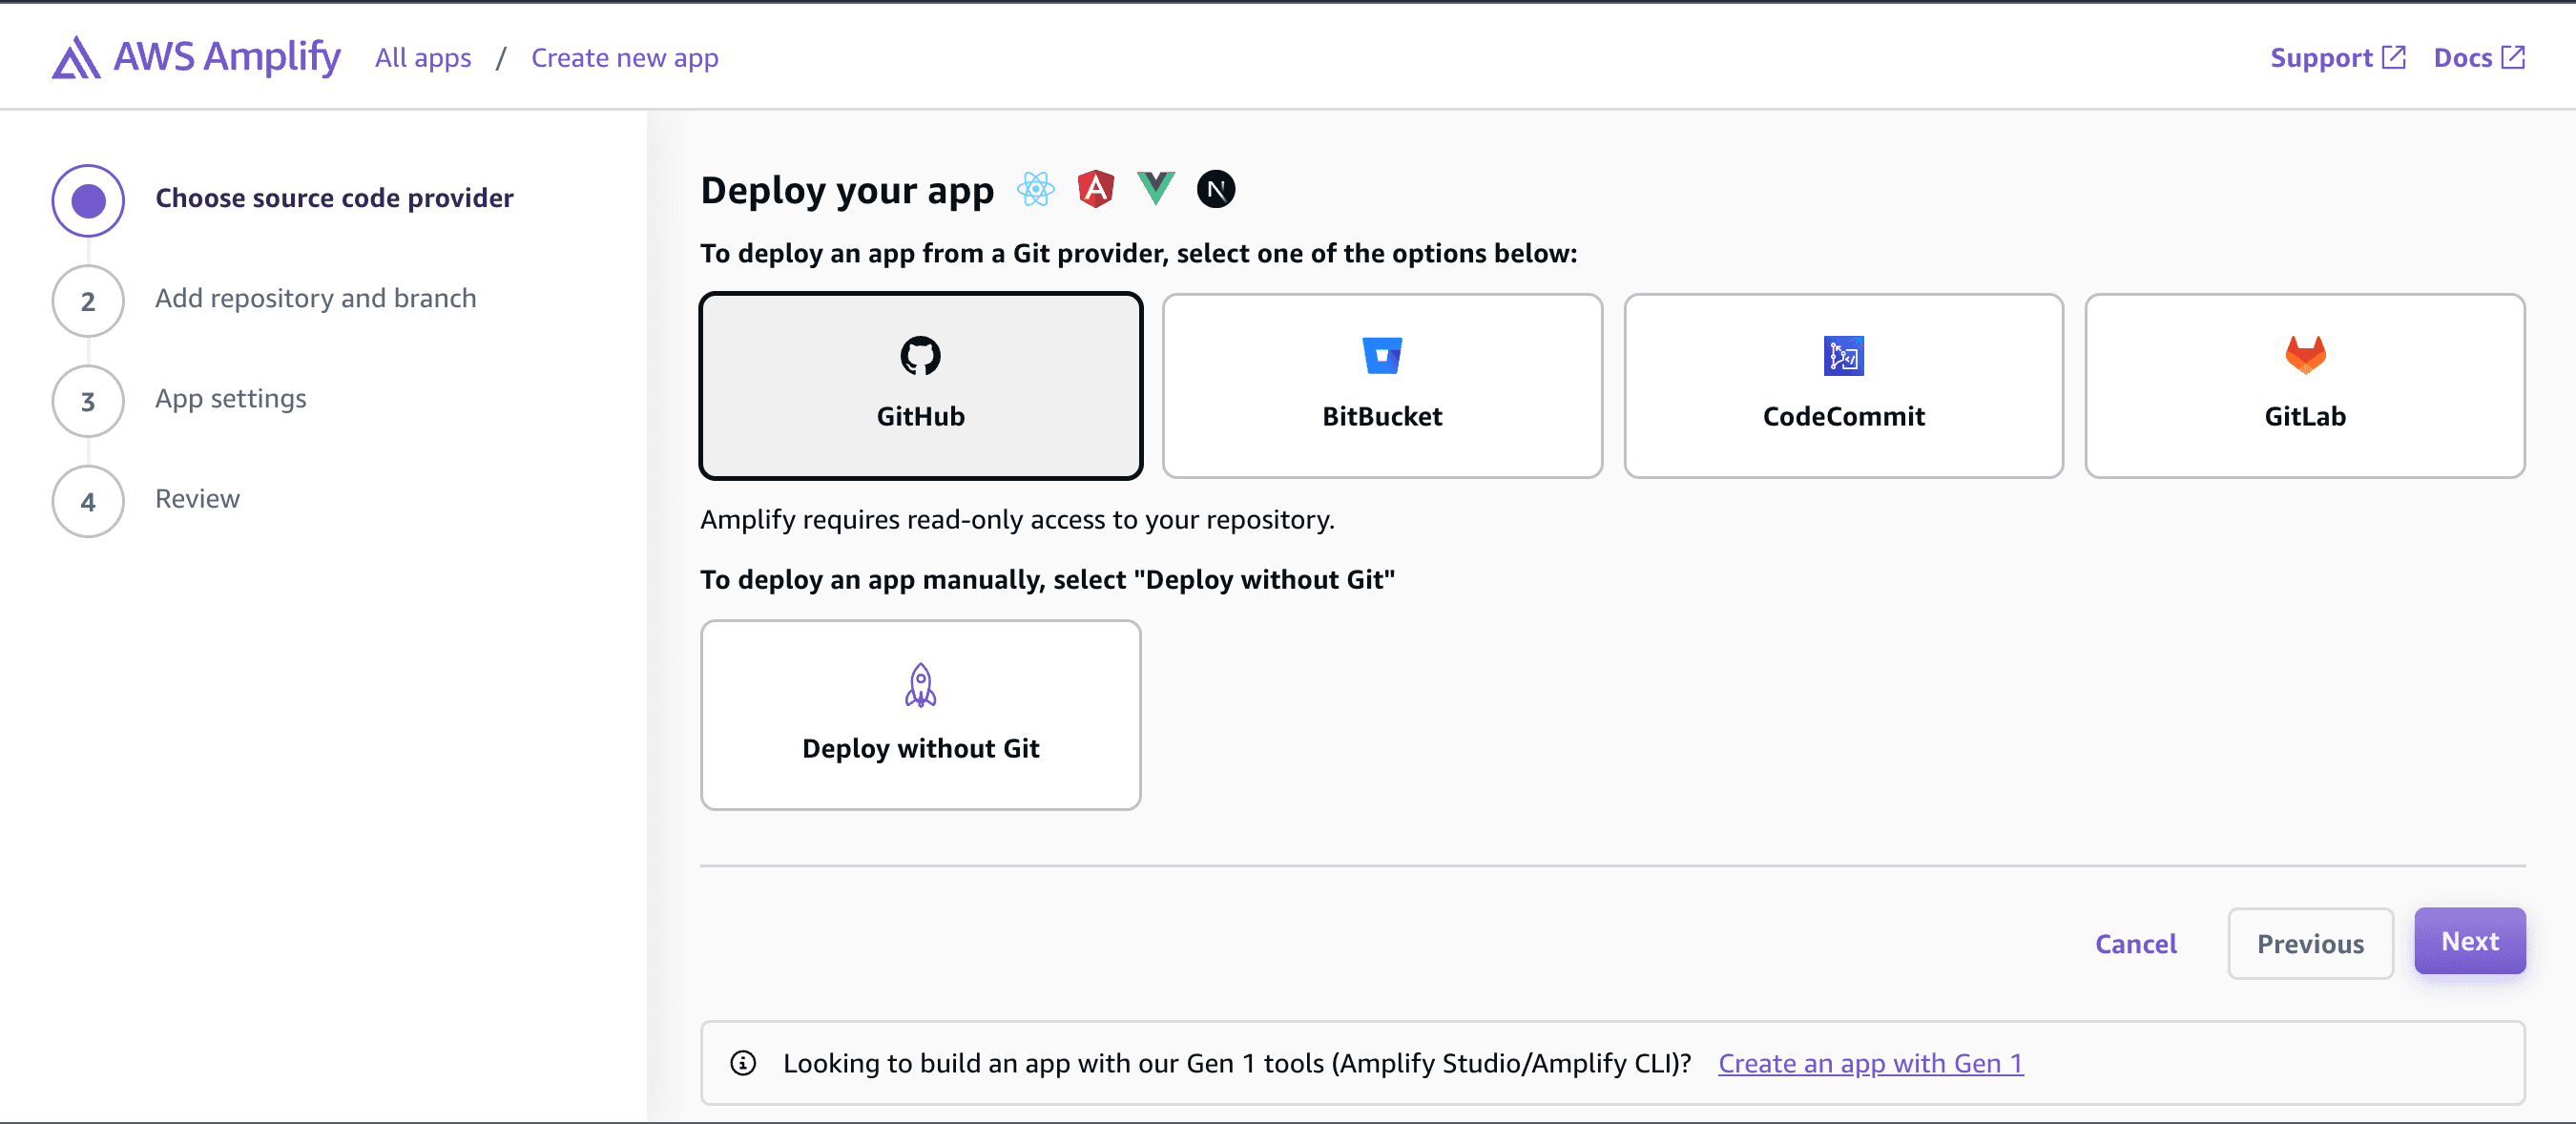
You will be prompted to connect your Github repository. Click on the “Connect App” button and select Github as your preferred repository. Authenticate with your Github account by entering your credentials, and then choose the
Specific repository you want to connect to the Amplify service. After successful authentication, select the repository you wish to deploy and follow any additional prompts to complete the connection.
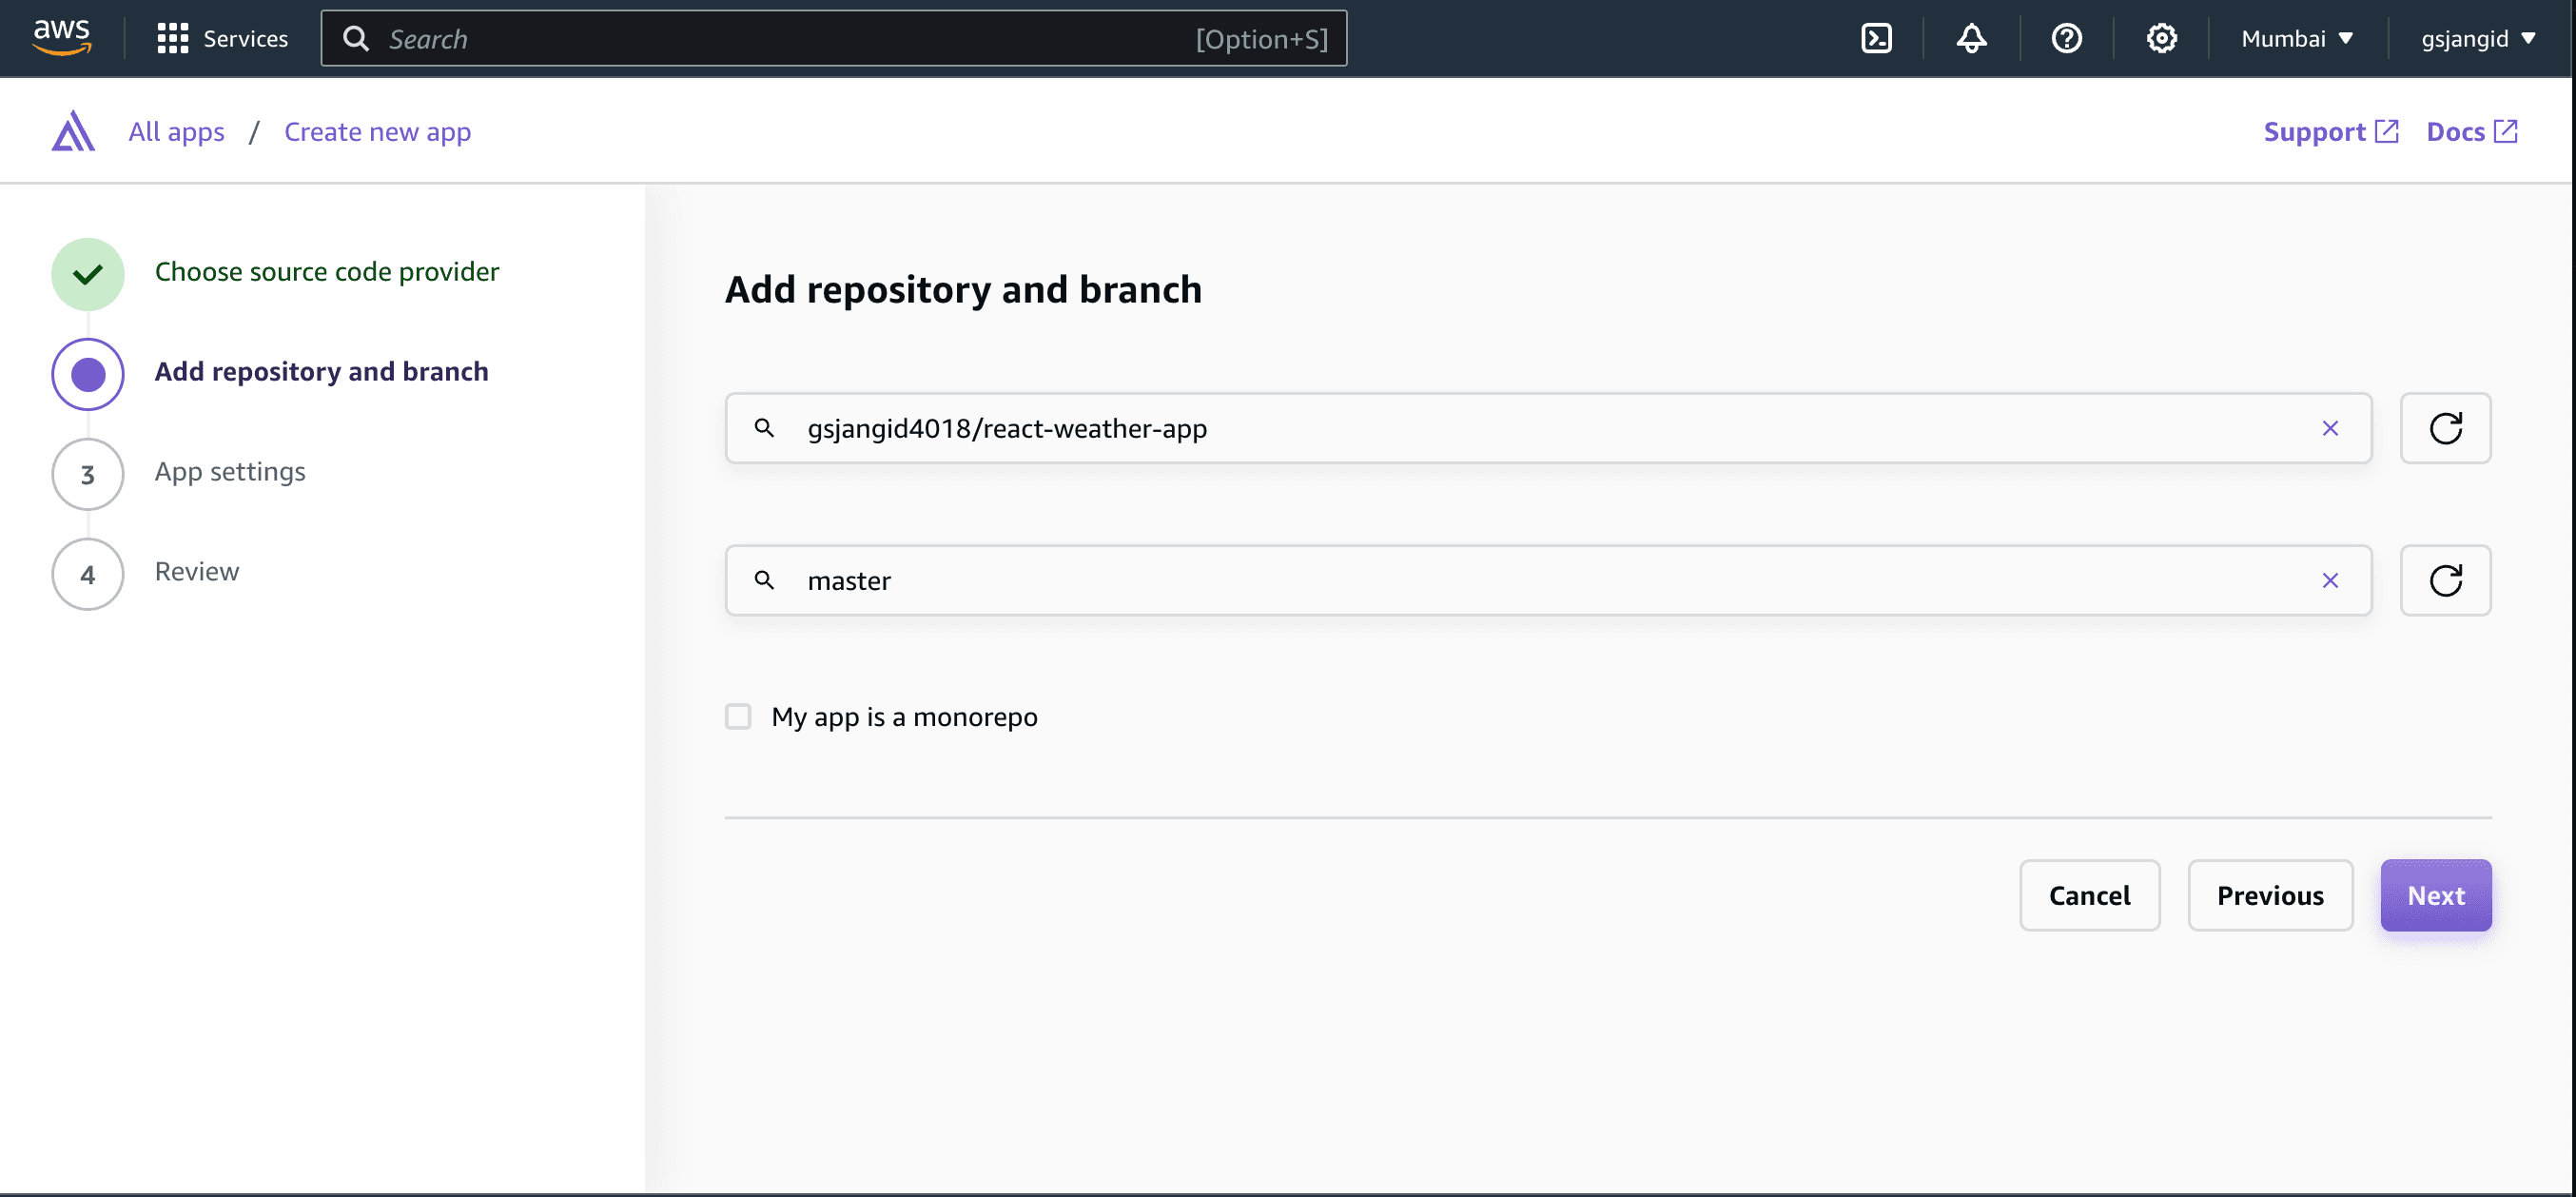
Configure the GitHub repository by creating and setting up the necessary repository and branch for your project. Ensure that you have the correct permissions and settings configured to match your project's requirements.
Once the repository is configured, proceed to the next page where you can continue with the subsequent steps in your workflow. This will involve more detailed instructions on how to manage and collaborate on your project effectively.
- First, configure the application name. Amplify will efficiently detect your build framework automatically, ensuring that the setup process is seamless and straightforward.
- Next, you will need to add the appropriate build command and run command. This step is crucial as it ensures that your application is correctly compiled and executed, enabling smooth and efficient operation.
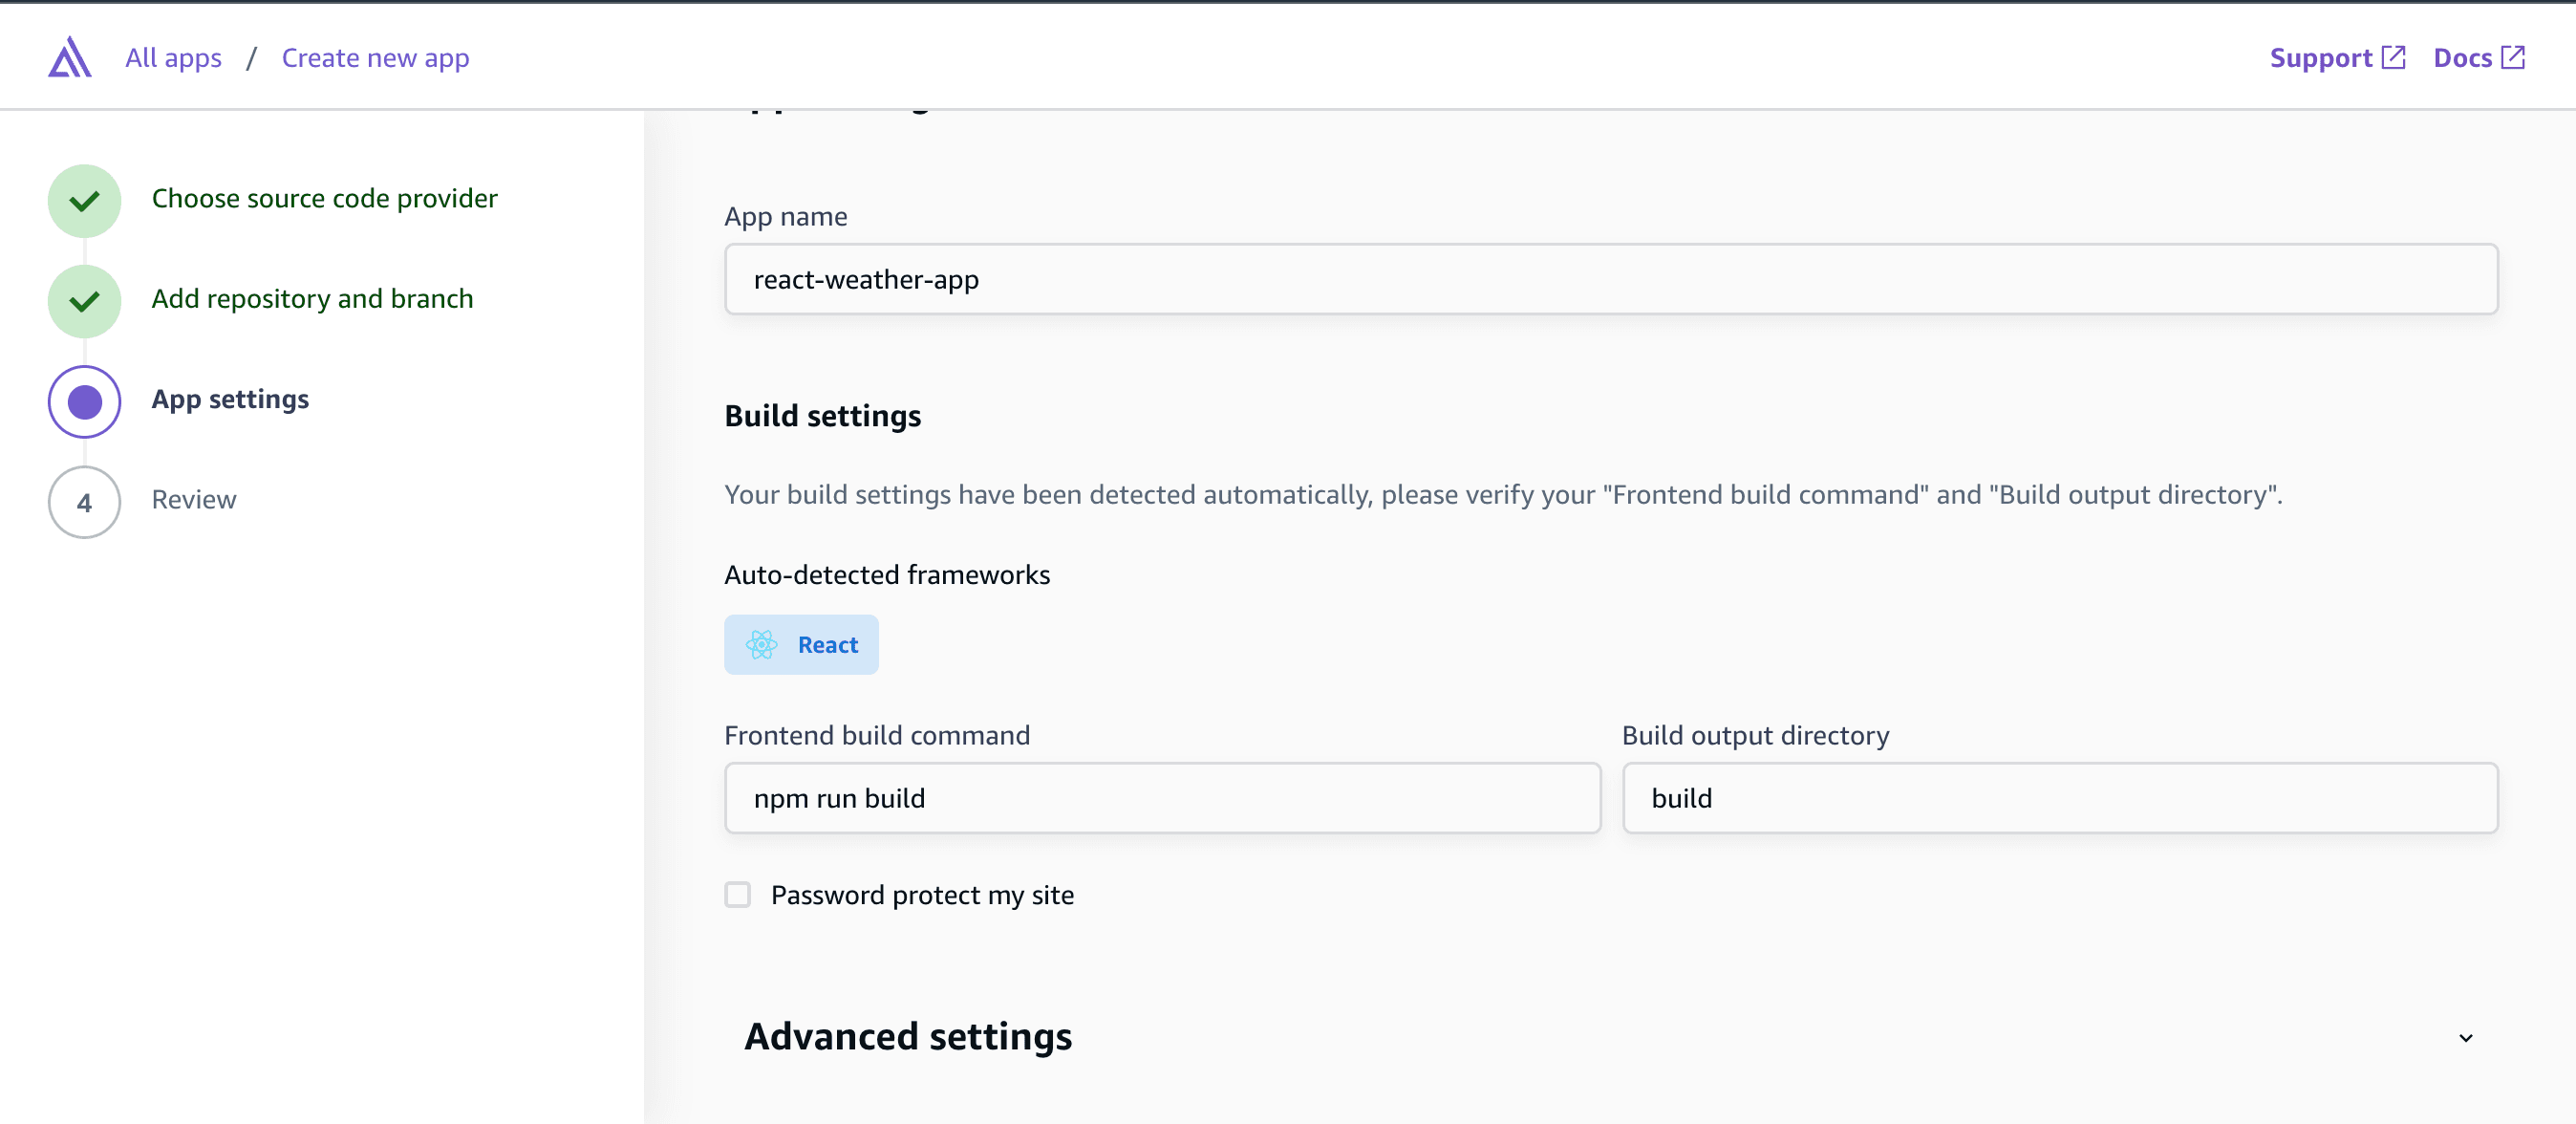
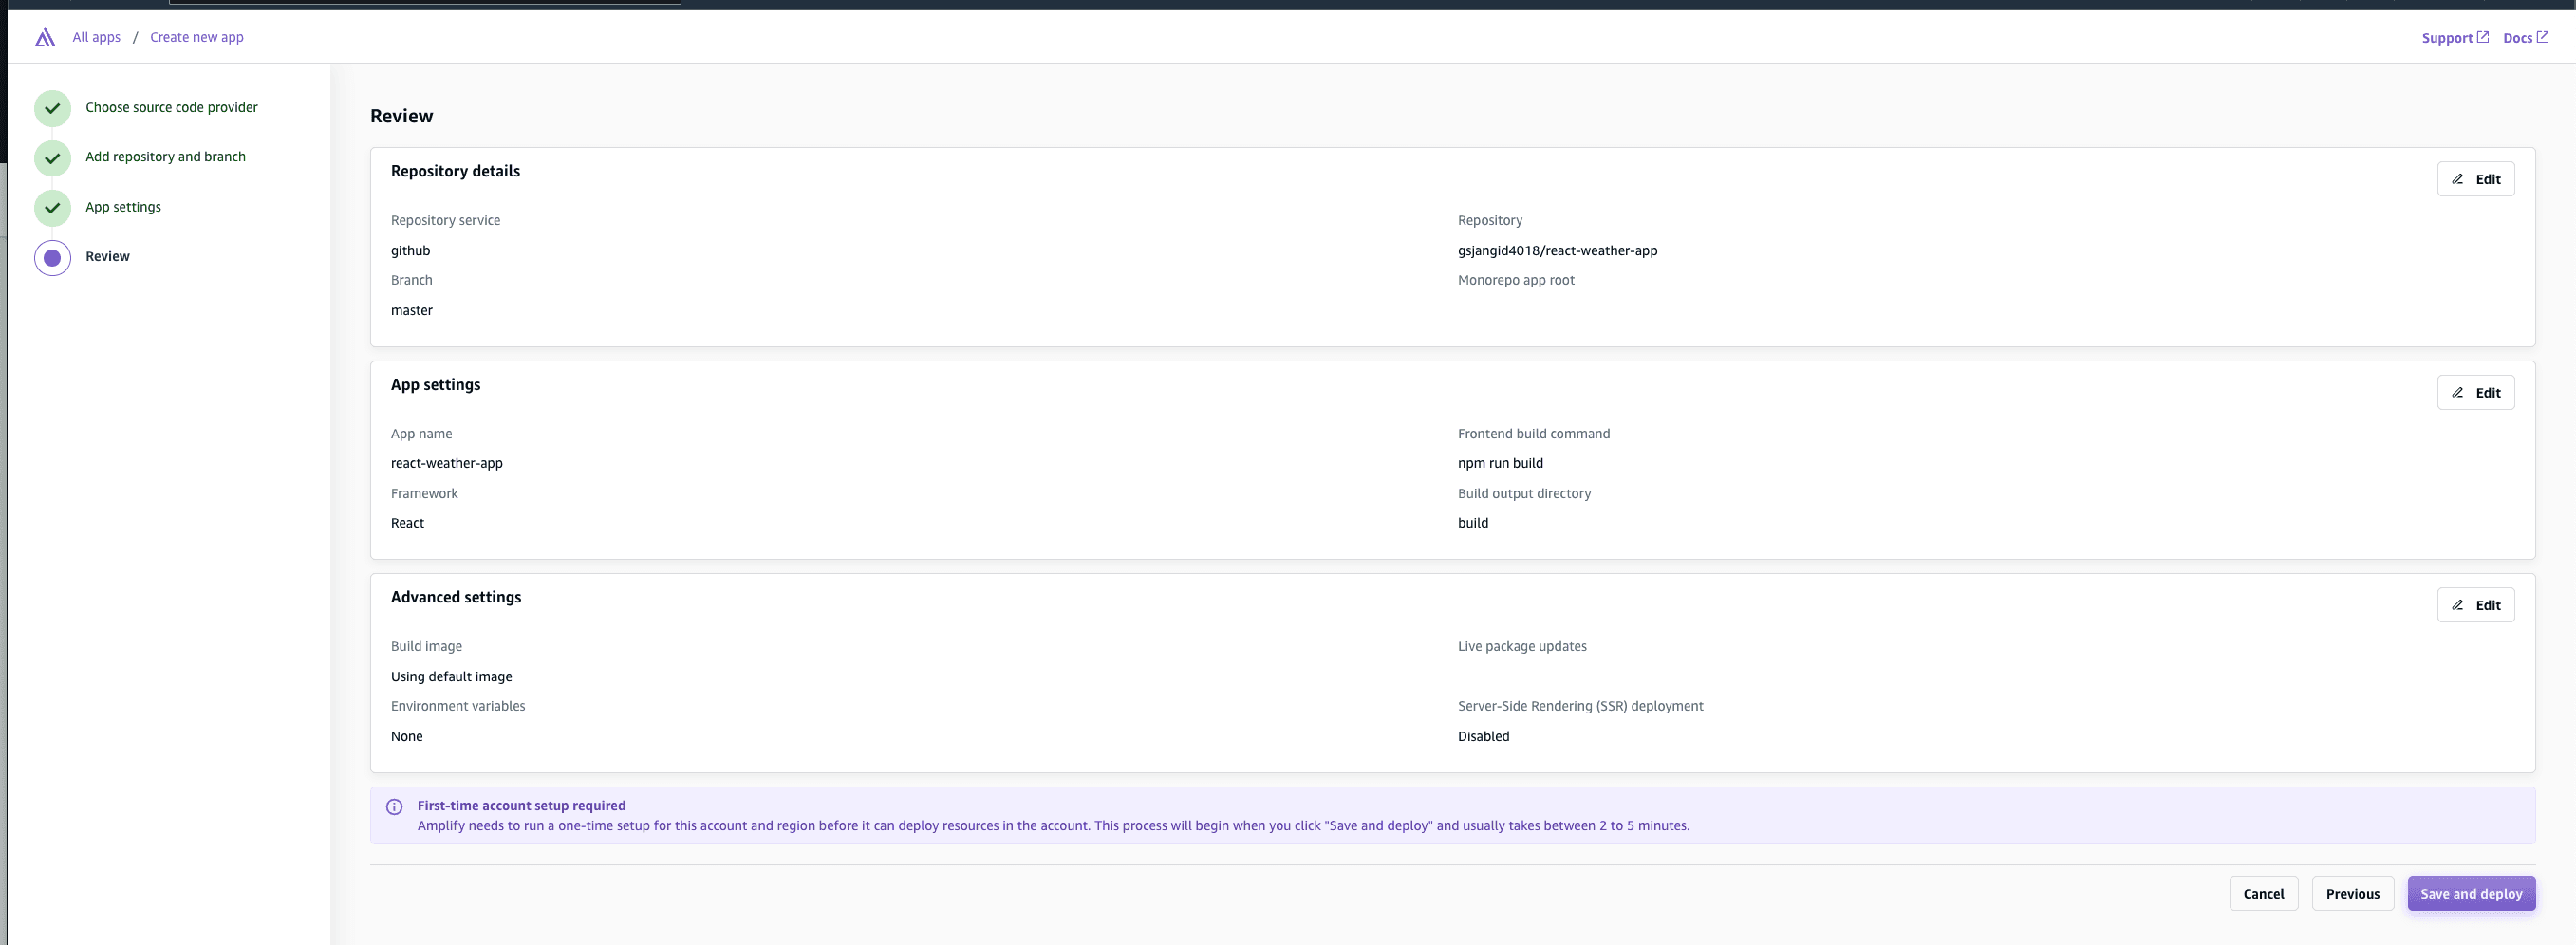
- Review the configuration thoroughly, paying close attention to various aspects such as repository details and application settings. Ensure that you also delve into the advanced settings, which can include a wide range of options.
- If you need to configure environment variables, make sure to do so with care and precision. Properly setting up environment variables can be crucial for the application's performance and security.
Step 3: Configure AWS Amplify CI/CD
1. Set Up CI/CD
- Amplify will create an
amplify.ymlfile in the root directory. - Ensure the
frontendsection includes your build and deploy settings.
frontend:
  phases:
    preBuild:
      commands:
        - npm ci
    build:
      commands:
        - npm run build
  artifacts:
    baseDirectory: build
    files:
      - '**/*'
2. Commit and Push
Commit the changes, including the
amplify.ymlfile, to your GitLab repository.git add .git commit -m "Configure Amplify CI/CD"git push
3. Monitor Deployment
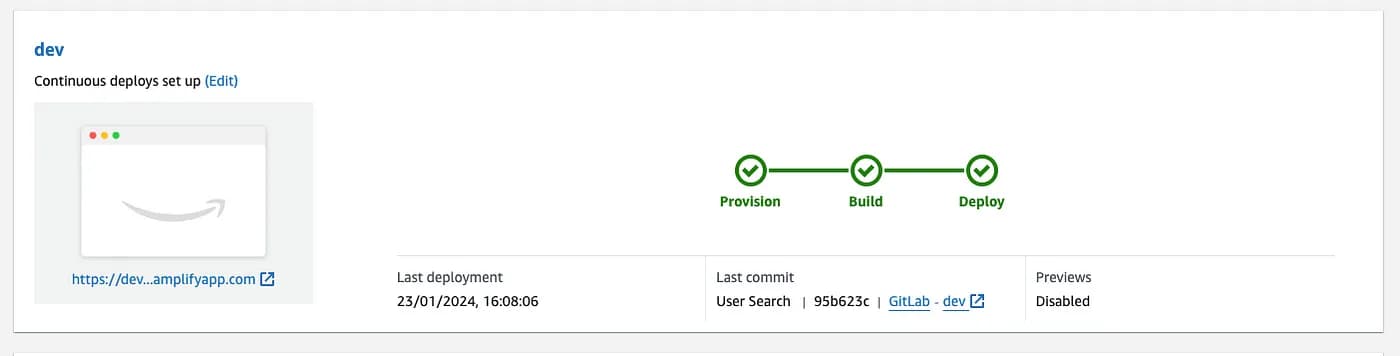
- Visit the Amplify console to monitor the deployment progress.
Step 4: Accessing Your Deployed React App
- View Deployment
- Once the deployment is complete, access your React application’s URL provided by Amplify.
- Test with GitHub Branch
- Create a new branch in your GitLab repository (e.g.,
feature-branch). - Make changes and commit to the new branch.
- Push changes to the branch.
- Create a new branch in your GitLab repository (e.g.,
- Automated Deployment
- Amplify will automatically detect the changes in the new branch and trigger the CI/CD pipeline.
- Monitor the progress in the Amplify console.
Conclusion
- Comprehensive Tool Suite: AWS Amplify simplifies web and mobile app development with a full suite of tools.
- Seamless Integration: It integrates effortlessly with popular frontend frameworks.
- Backend Services: Provides essential services like authentication, API integration, data storage, and hosting.
- Easy-to-Use CLI: Amplify's CLI and extensive documentation streamline the development process.
- Community Support: Strong community support aids in resolving issues and sharing knowledge.
- Advanced Features: Continuous deployment, analytics, and push notifications enhance app functionality.
- Focus on User Experience: Developers can concentrate on delivering exceptional user experiences, reducing operational overhead.