
- Authors
- Written by :
- Name
- Puneet Yadav
Playwright Best Practices: Tips and Techniques for Effective Test Automation
- Published on
- Published On:
- Updated on
- Last Updated On:

Introduction
Automating websites and apps can be challenging, but Playwright from Microsoft makes it a breeze. It helps testers automate tasks across different web browsers like a pro. To nail it with Playwright, you must use the best tricks and strategies. This blog is all about breaking it down in simple terms: how to pick the right elements easily, keep your tests organized neatly, handle those tricky timing issues smartly, and smoothly fit tests into your development process.
These practices will make your tests run like a well-oiled machine, find problems quicker, and help you build top-notch software with Playwright. So, whether you’re a seasoned tester or just diving in, buckle up as we take you through the essentials of using Playwright to ace your automation game!
Foundational Steps in Test Planning: Defining Clear Coverage Goals
Before you dive into code, take a moment to figure out your testing goals. Ask yourself: Are you focusing on the main stuff, specific user paths, or unusual situations? Knowing this helps you decide which tests to do first and use your resources smartly. When you set clear testing goals from the start, you're building a strong base for testing that really works for your project. This not only makes your software better but also makes testing quicker and more effective.
Importance of Having a Strong Framework
In tools like Playwright, a framework acts as a solid foundation by organizing tests into manageable sections. This makes them easier to handle and understand with clear names and comments. Frameworks also save time by reusing actions across tests and ensuring that one test's failure doesn't disrupt others. Overall, frameworks streamline automated testing, making it more reliable and efficient for software development.
Below are the Key Considerations for Creating an Effective Automation Framework
1. Page Object Model (POM)
Page Object Model (POM) is a design pattern used in test automation to enhance code maintainability and readability. It involves creating a separate class or module for each web page or component of an application. This class encapsulates the page's elements and functionality, allowing tests to interact with the page through high-level methods. POM promotes reusability and reduces code duplication by centralizing page-specific logic within dedicated classes or modules.
//Page Class

class LoginPage {
  constructor(page) {
    this.page = page
  }

  async open() {
    await this.page.goto('https://example.com/login')
  }

  async login(username, password) {
    await this.page.fill('#username', username)
    await this.page.fill('#password', password)
    await this.page.click('[data-testid="login-button"]')
  }
}

module.exports = LoginPage
//Test class where we are using Page class

const { test, expect } = require('@playwright/test')
const { LoginPage } = require('./LoginPage')

test('Login functionality', async ({ page }) => {
  const loginPage = new LoginPage(page)

  await loginPage.open()
  await loginPage.login('your-username', 'your-password')

  // Assertion for successful login
  await expect(page.locator('h1')).toHaveText('Welcome')
})
2. Use of JSON files for Data-driven testing
Using JSON files in Playwright for data-driven testing simplifies managing login details. In users.json, we define validUser and invalidUser with usernames and passwords. These are used in login.test.js for tests: userData.validUser for successful logins and userData.invalidUser for failed logins. This keeps data organized, makes tests clear, and allows for easy updates. It's flexible and works well with different data sources, ensuring efficient testing in Playwright.
// Creating .json file and storing all positive and negative Test data
{
  "validUser": {
    "username": "testuser",
    "password": "password123"
  },
  "invalidUser": {
    "username": "invaliduser",
    "password": "wrongpassword"
  }
}
//Using above .json data in Test class

const { test, expect } = require('@playwright/test')
const { LoginPage } = require('./LoginPage')
const userData = require('./users.json')

test('Login with valid credentials', async ({ page }) => {
  const loginPage = new LoginPage(page)

  await loginPage.open()
  await loginPage.login(userData.validUser.username, userData.validUser.password)

  // Assertion for successful login
  await expect(page.locator('h1')).toHaveText('Welcome')
})

test('Login with invalid credentials', async ({ page }) => {
  const loginPage = new LoginPage(page)

  await loginPage.open()
  await loginPage.login(userData.invalidUser.username, userData.invalidUser.password)

  // Assertion for invalid login message
  await expect(page.locator('[data-testid="error-message"]')).toHaveText('Invalid credentials')
})
3. Use of .env files for setting up environment variables
Automation frameworks prioritize security and maintainability using .env files. These files securely store sensitive data like passwords separately from code. They manage environment-specific settings (e.g., URLs, database connections) without altering core scripts, reducing errors. .env files improve code readability by keeping sensitive information out of test scripts, aiding collaboration and updates. Excluded from version control, they ensure secure development practices. In summary, .env files are essential for robust automation frameworks, safeguarding data, simplifying environment management, and enhancing testing efficiency.
Below are High-level steps to setup .env files
- Create a package named
envWithin this package, create.env.EnvironmentNamefiles according to your specific requirements.
env/
	|- .env.Development
	|- .env.Qa
	|- .env.Staging
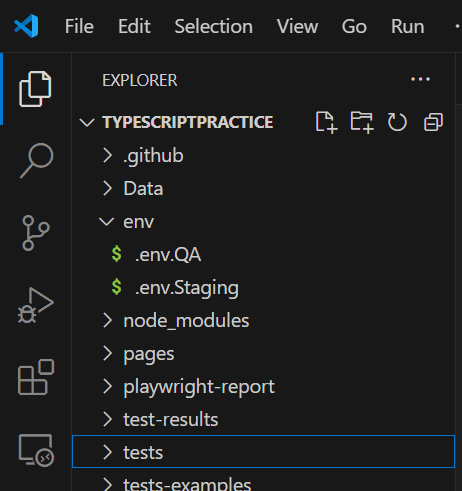
- Store environment-specific sensitive data in dedicated
.env.EnvironmentNamefiles under theenvpackage. This practice ensures secure and organized management of configuration settings across different environments.
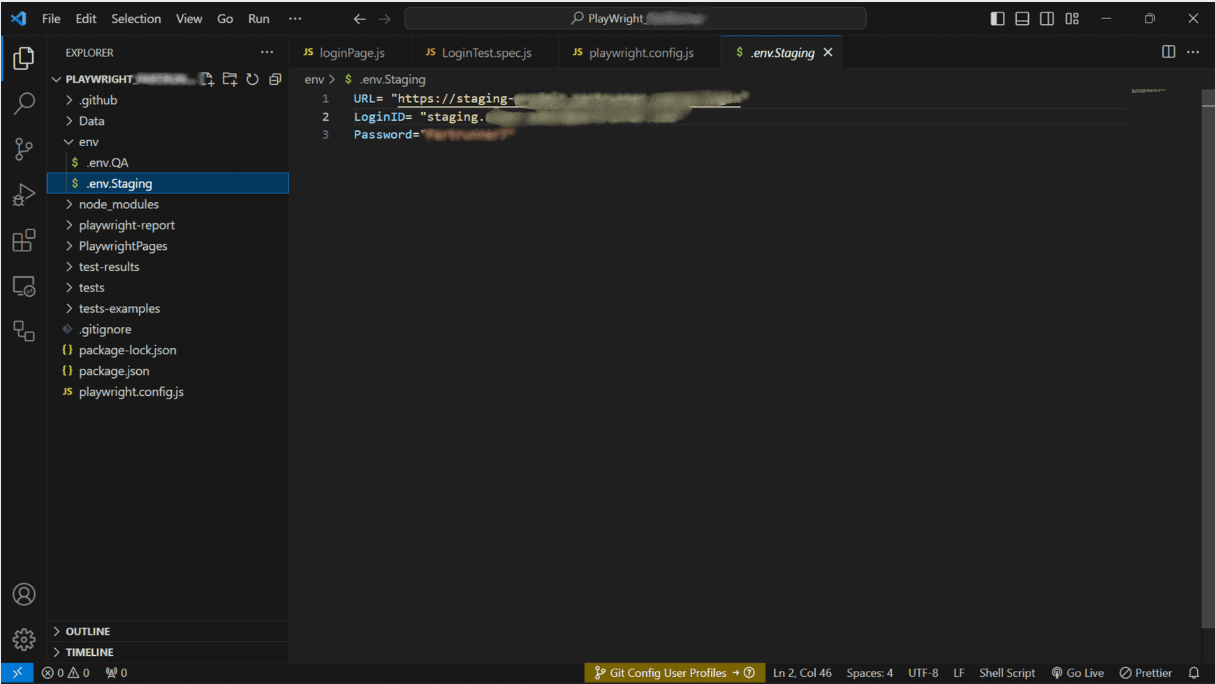
- To set the path of the
.envfile inplaywright.config.js, use the dotenv package to load environment-specific configurations. Update the configuration as follows

4. Use of Custom Commands
Custom commands in an automation framework help by creating reusable functions for common actions. They make tests clearer, easier to maintain, and more organized, allowing you to handle repetitive tasks, manage test data, and streamline complex workflows.
// helpers/auth.js - Create reusable helper functions
async function login(page, username, password) {
  await page.fill('input[name="username"]', username)
  await page.fill('input[name="password"]', password)
  await page.click('button[type="submit"]')
}

module.exports = { login }
// test.spec.js - Usage in test files
const { test, expect } = require('@playwright/test')
const { login } = require('./helpers/auth')

test('User login test', async ({ page }) => {
  await page.goto('https://example.com/login')
  await login(page, 'user123', 'pass123')

  // Assert successful login
  await expect(page.locator('h1')).toHaveText('Dashboard')
})
5. Use of YML files
In Playwright, we use YML files for GitHub Actions or other CI tools manage test workflows. They set up environments, run test scripts, and define conditions for test execution. This automation supports continuous integration by running tests on code changes and reporting results.
name: Playwright Tests

on: [push]

jobs:
  test:
    runs-on: ubuntu-latest
    steps:
      - name: Checkout code
        uses: actions/checkout@v3
      - name: Set up Node.js
        uses: actions/setup-node@v3
        with:
          node-version: '18'
      - name: Install dependencies
        run: npm install
      - name: Run Playwright tests
        run: npx playwright test
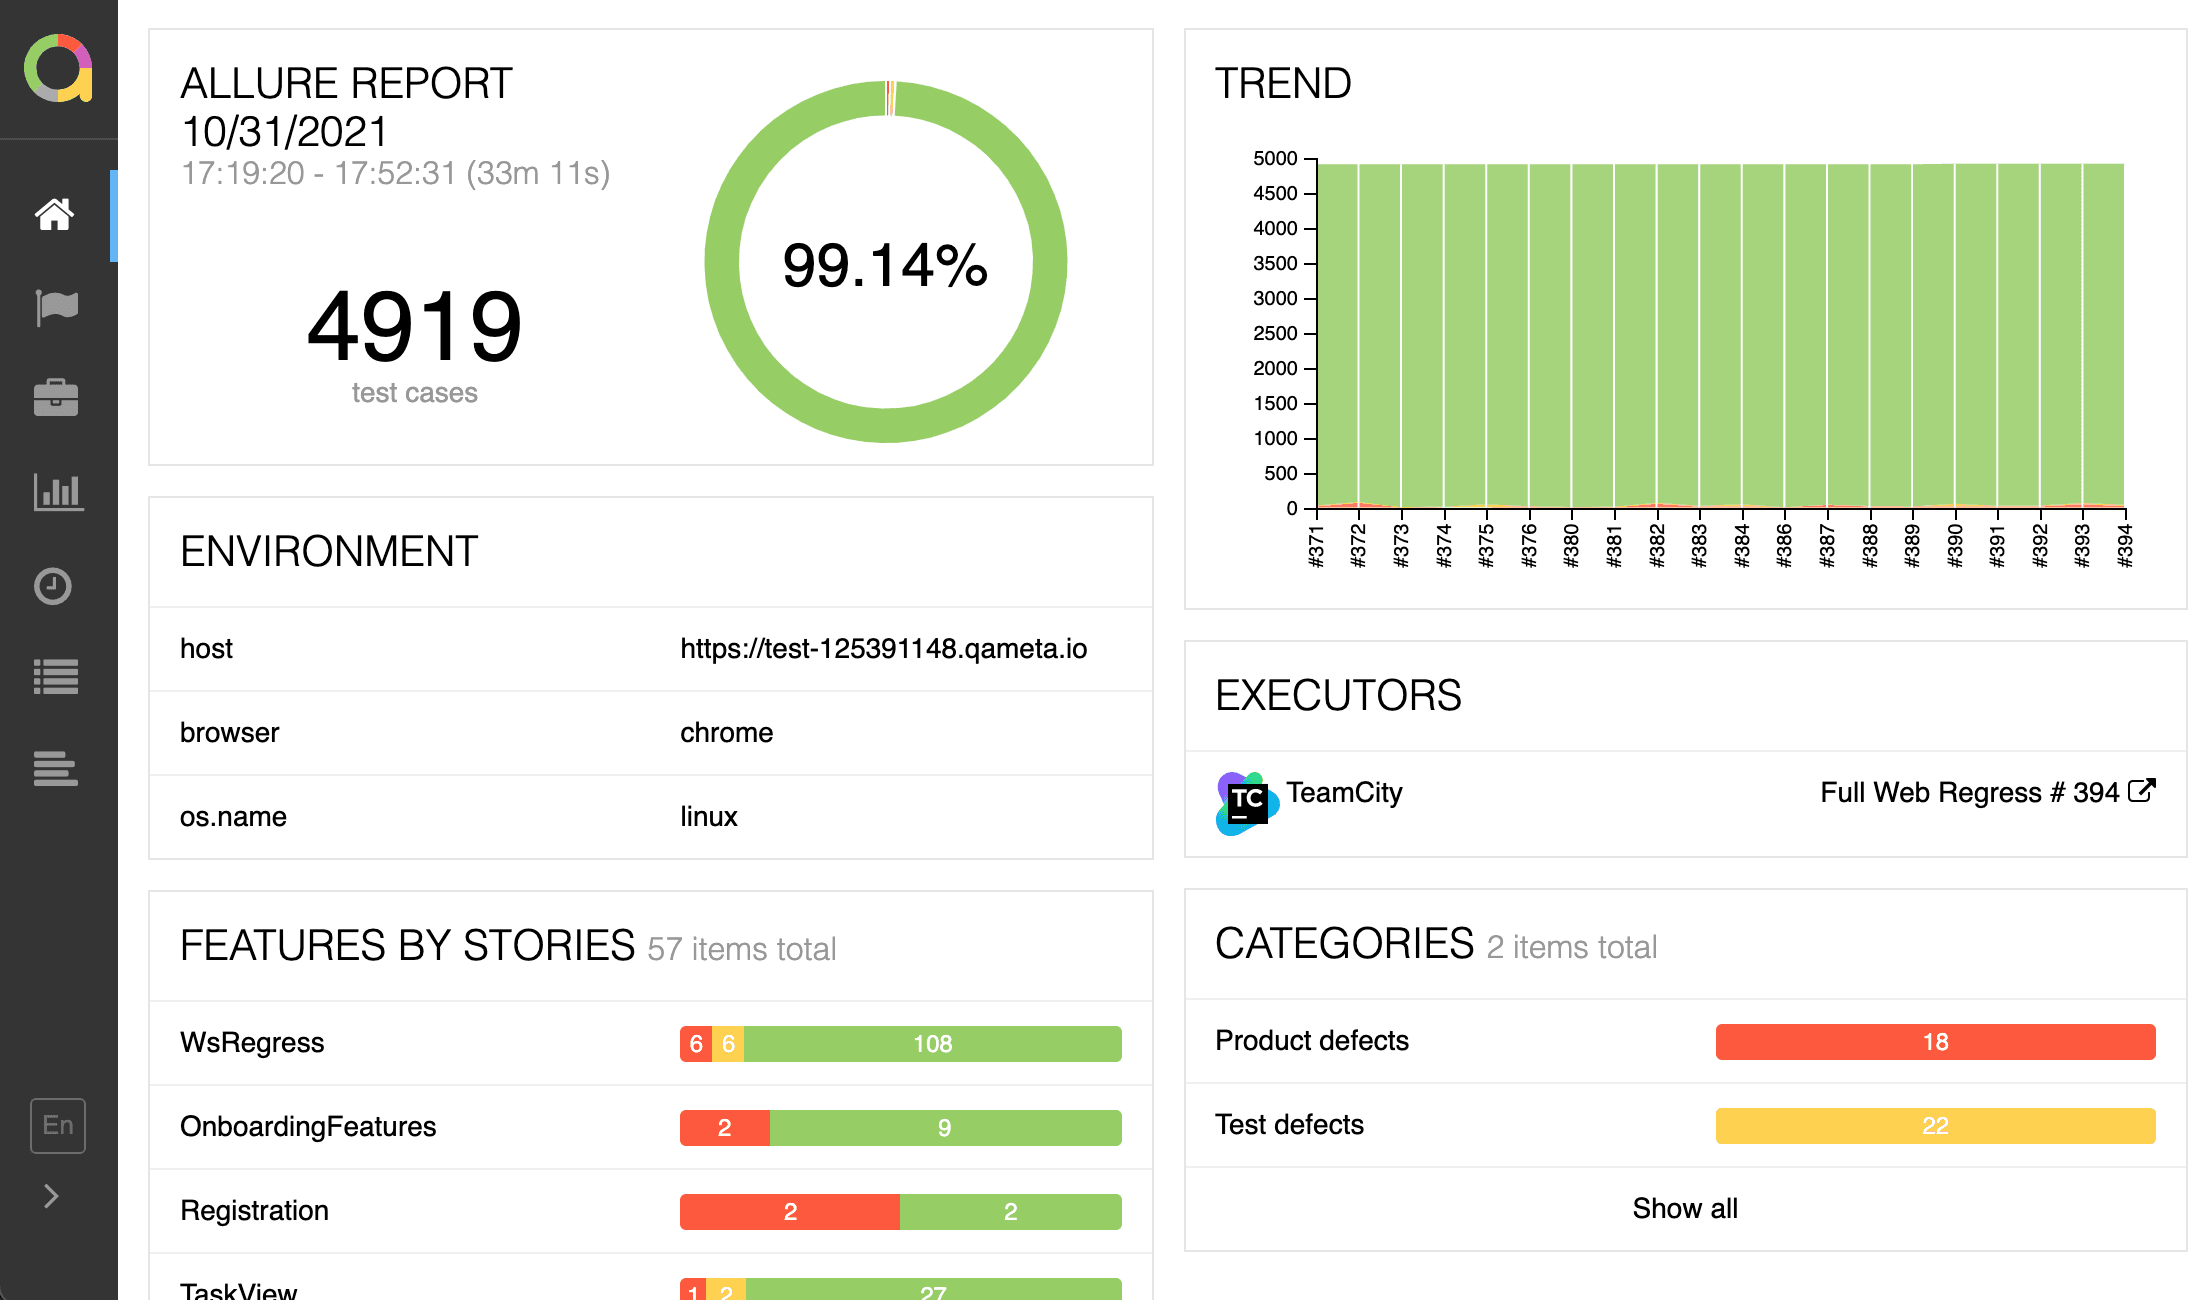
6. Use of Third Party Reporters like Allure
Allure reports provide detailed, interactive, and visually appealing test execution reports in various formats, helping testers and stakeholders easily analyze and understand test results.
7. Use of Fixtures for Reusable Setup
Fixtures in Playwright provide reusable setup and teardown logic for tests. They help maintain clean, isolated tests by handling repetitive tasks like authentication, data setup, and browser configuration. Fixtures ensure consistency across tests and reduce code duplication.
// fixtures/auth.fixture.js
const { test as base } = require('@playwright/test')

const test = base.extend({
  // Custom fixture for authenticated user
  authenticatedPage: async ({ page }, use) => {
    // Setup: Login before each test
    await page.goto('https://example.com/login')
    await page.fill('[data-testid="username"]', 'testuser')
    await page.fill('[data-testid="password"]', 'password123')
    await page.click('[data-testid="login-button"]')
    await page.waitForURL('**/dashboard')

    // Use the authenticated page in tests
    await use(page)

    // Teardown: Logout after each test
    await page.click('[data-testid="logout-button"]')
  }
})

module.exports = { test }
// tests/dashboard.spec.js
const { test, expect } = require('../fixtures/auth.fixture')

test('Access dashboard with authenticated user', async ({ authenticatedPage }) => {
  // Page is already authenticated via fixture
  await expect(authenticatedPage.locator('h1')).toHaveText('Dashboard')
  await expect(authenticatedPage.locator('[data-testid="user-menu"]')).toBeVisible()
})
8. Keep Tests Isolated and Independent
Each test should run independently without relying on other tests' data or state. Use beforeEach and afterEach hooks to reset the environment and ensure clean test isolation.
const { test, expect } = require('@playwright/test')

test.describe('User Management Tests', () => {
  let testUser = null

  test.beforeEach(async ({ page }) => {
    // Setup fresh data before each test
    await page.goto('https://example.com')
    testUser = {
      id: Date.now(),
      name: `TestUser_${Date.now()}`,
      email: `test_${Date.now()}@example.com`,
    }
  })

  test.afterEach(async ({ page }) => {
    // Cleanup after each test
    if (testUser?.id) {
      await page.request.delete(`/api/users/${testUser.id}`)
    }
  })

  test('Create new user', async ({ page }) => {
    // Test runs with fresh data and cleans up automatically
    await page.fill('[data-testid="user-name"]', testUser.name)
    await page.fill('[data-testid="user-email"]', testUser.email)
    await page.click('[data-testid="create-user"]')

    await expect(page.locator('[data-testid="success-message"]')).toBeVisible()
  })
})
9. Avoid Sleeps - Use Proper Waiting Mechanisms
Never use setTimeout or hard sleeps. Instead, use Playwright's built-in waiting mechanisms to make tests more reliable and faster.
// ❌ Bad: Using hard sleeps
test('Bad example with sleep', async ({ page }) => {
  await page.click('[data-testid="submit-button"]')
  await page.waitForTimeout(3000) // Unreliable and slow
  await expect(page.locator('[data-testid="result"]')).toBeVisible()
})

// ✅ Good: Using proper waiting mechanisms
test('Good example with proper waits', async ({ page }) => {
  await page.click('[data-testid="submit-button"]')

  // Wait for specific conditions
  await page.waitForSelector('[data-testid="result"]')
  await expect(page.locator('[data-testid="result"]')).toBeVisible()

  // Wait for network requests to complete
  await page.waitForLoadState('networkidle')

  // Wait for element with custom timeout
  await expect(page.locator('[data-testid="success-message"]')).toBeVisible({ timeout: 10000 })
})
10. Validate Critical Flows First - Focus on Smoke Tests
Prioritize testing critical user journeys, smoke tests, and high-risk paths. Use test tags to organize and run selective test suites efficiently.
// tests/smoke.spec.js
const { test, expect } = require('@playwright/test')

test.describe('Smoke Tests @smoke', () => {
  test('Critical user journey - Login to Purchase', async ({ page }) => {
    // Step 1: Login
    await page.goto('https://example.com/login')
    await page.fill('[data-testid="username"]', 'testuser')
    await page.fill('[data-testid="password"]', 'password123')
    await page.click('[data-testid="login-button"]')

    // Step 2: Navigate to product
    await page.click('[data-testid="products-menu"]')
    await page.click('[data-testid="product-1"]')

    // Step 3: Add to cart
    await page.click('[data-testid="add-to-cart"]')
    await expect(page.locator('[data-testid="cart-count"]')).toHaveText('1')

    // Step 4: Checkout process
    await page.click('[data-testid="cart-icon"]')
    await page.click('[data-testid="checkout-button"]')
    await expect(page.locator('h1')).toHaveText('Checkout')
  })
})

// Run smoke tests: npx playwright test --grep @smoke
11. Parallelize Tests for Speed
Configure parallel execution to speed up test runs using Playwright's built-in parallelization features.
// playwright.config.js
module.exports = {
  // Run tests in parallel
  workers: process.env.CI ? 2 : undefined,

  // Parallel execution within test files
  fullyParallel: true,

  projects: [
    {
      name: 'chromium',
      use: { ...devices['Desktop Chrome'] },
    },
    {
      name: 'firefox',
      use: { ...devices['Desktop Firefox'] },
    },
  ],
}
// tests/parallel-tests.spec.js
const { test, expect } = require('@playwright/test')

// Run tests in this describe block in parallel
test.describe.parallel('Parallel User Tests', () => {
  test('User 1 registration', async ({ page }) => {
    // This test runs in parallel with others
    await page.goto('https://example.com/register')
    // ... test logic
  })

  test('User 2 registration', async ({ page }) => {
    // This test runs in parallel with others
    await page.goto('https://example.com/register')
    // ... test logic
  })
})
12. Maintain Readable and Clean Code
Write clear test names, use proper commenting, and maintain consistent code structure for better maintainability.
const { test, expect } = require('@playwright/test')

test.describe('E-commerce Checkout Process', () => {
  test('should complete purchase journey from product selection to payment confirmation', async ({
    page,
  }) => {
    // Step 1: Navigate to product catalog
    await page.goto('https://example.com/products')

    // Step 2: Select first available product
    const firstProduct = page.locator('[data-testid="product-card"]').first()
    await firstProduct.click()

    // Step 3: Add product to cart with quantity verification
    await page.selectOption('[data-testid="quantity-select"]', '2')
    await page.click('[data-testid="add-to-cart-button"]')

    // Verify cart update with clear assertion message
    await expect(page.locator('[data-testid="cart-badge"]')).toHaveText('2')

    // Step 4: Proceed to checkout
    await page.click('[data-testid="cart-icon"]')
    await page.click('[data-testid="proceed-to-checkout"]')

    // Verify checkout page loads correctly
    await expect(page).toHaveURL(/.*\/checkout/)
    await expect(page.locator('h1')).toHaveText('Checkout')
  })
})
13. Test Data Management and Cleanup
Implement proper test data cleanup strategies to avoid environment pollution and ensure consistent test runs.
const { test, expect } = require('@playwright/test')

test.describe('User Data Management', () => {
  const testUsers = []

  test.afterAll(async ({ request }) => {
    // Cleanup all test users created during test suite
    for (const user of testUsers) {
      try {
        await request.delete(`/api/users/${user.id}`)
        console.log(`Cleaned up user: ${user.email}`)
      } catch (error) {
        console.warn(`Failed to cleanup user: ${user.email}`)
      }
    }
  })

  test('Create multiple users with automatic cleanup', async ({ page, request }) => {
    // Create test user data
    const userData = {
      name: `TestUser_${Date.now()}`,
      email: `test_${Date.now()}@example.com`,
      role: 'standard',
    }

    // Create user via API
    const response = await request.post('/api/users', {
      data: userData,
    })
    const createdUser = await response.json()
    testUsers.push(createdUser) // Track for cleanup

    // Verify user creation in UI
    await page.goto('/admin/users')
    await expect(page.locator(`[data-testid="user-${createdUser.id}"]`)).toBeVisible()
  })
})
14. Test Tagging and Selective Execution
Use tags to organize tests into categories and run specific test suites based on requirements.
// tests/regression.spec.js
const { test, expect } = require('@playwright/test')

test.describe('User Authentication @regression @auth', () => {
  test('Login with valid credentials @smoke @critical', async ({ page }) => {
    // Critical test logic
  })

  test('Password reset functionality @regression', async ({ page }) => {
    // Regression test logic
  })

  test('Account lockout after failed attempts @security @edge-case', async ({ page }) => {
    // Security test logic
  })
})
# Run specific tagged tests
npx playwright test --grep @smoke
npx playwright test --grep "@regression and @auth"
npx playwright test --grep "@critical or @smoke"
15. Screenshot and Video Capture for Debugging
Configure automatic screenshot and video capture for failed tests to aid in debugging.
// playwright.config.js
module.exports = {
  use: {
    // Capture screenshot on failure
    screenshot: 'only-on-failure',

    // Record video for failed tests
    video: 'retain-on-failure',

    // Capture trace on failure for detailed debugging
    trace: 'retain-on-failure',
  },

  projects: [
    {
      name: 'chromium',
      use: {
        ...devices['Desktop Chrome'],
        // Custom screenshot settings per project
        screenshot: { mode: 'only-on-failure', fullPage: true },
      },
    },
  ],
}
// Custom screenshot capture in tests
test('Custom screenshot example', async ({ page }) => {
  await page.goto('https://example.com')

  // Take screenshot at specific points
  await page.screenshot({ path: 'before-action.png' })

  await page.click('[data-testid="important-button"]')

  // Screenshot after critical action
  await page.screenshot({
    path: 'after-action.png',
    fullPage: true,
  })
})
Use of Assertion with Clarity
Assertions in Playwright are crucial for validating that web applications meet expected behaviors and conditions during tests. They check various elements, attributes, or states, ensuring that your application functions correctly. Assertions help confirm that elements are visible, text content matches expectations, or URLs and page titles are correct. Write clear and straightforward tests to check if things are working as expected. Make sure your tests reflect what users would expect.
A few examples are listed below
// Check if the h1 element contains the text "Welcome"
await expect(page.locator('h1')).toHaveText('Welcome')
// Check if the button is visible
await expect(page.locator('button#submit')).toBeVisible()
// Check if the input field is enabled
await expect(page.locator('input#username')).toBeEnabled()
// Check if the page URL is correct
await expect(page).toHaveURL('https://example.com/home')
// Check if the page title is "Home Page"
await expect(page).toHaveTitle('Home Page')
// Check if the link has the correct href attribute
await expect(page.locator('a#about')).toHaveAttribute('href', '/about')
// Check if the input value is "testUser"
await expect(page.locator('input#username')).toHaveValue('testUser')
// Check if there are exactly 3 items in the list
await expect(page.locator('ul#items > li')).toHaveCount(3)
// Wait for the element to be visible
await expect(page.locator('button#submit')).toBeVisible({ timeout: 5000 })
Use of Proper Locators
For stable tests, target elements precisely. Prioritize unique IDs and class names. If those aren't available, use descriptive text content. For accessibility testing, leverage role selectors. Avoid complex XPaths and generic selectors like tags, as UI changes can break them. This keeps your tests reliable.
The most recommended Locator in Playwright is Locate by test id even if your text or role of the attribute changes the test will still pass
Ask your Developer to add test IDs as attributes to elements in the code
<button data-testid="submit-button">Submit</button>
// Clicks the button with the test ID "submit-button"
await page.getByTestId('submit-button').click()
Use of APIs Mocking and Stubbing
When developing automated tests, there are situations where you need to simulate specific API responses or test features that are not yet implemented by the backend. In such cases, mocking and stubbing are essential techniques that help you create effective and reliable tests. Here’s a detailed overview of these techniques, their uses, and best practices
When these can be Implemented?
- If you need to test how your application is going to behave when put on different API responses
// Mocking response data
await page.route('https://example.com/api/data', (route) => {
  route.fulfill({
    status: 200,
    contentType: 'application/json',
    body: JSON.stringify({ key: 'mockedValue' }),
  })
})
- When you want to test a feature which is under development or has not been implemented yet
// Mocking error response
await page.route('https://example.com/api/unimplemented', (route) => {
  route.fulfill({
    status: 404,
    contentType: 'application/json',
    body: JSON.stringify({ error: 'Not Found' }),
  })
})
- When you want to simulate slow network response or Total failure
// Simulating a network failure
await page.route('https://example.com/api/data', (route) => {
  route.abort('failed')
})
Handle Authentication and State
Playwright keeps your tests separate like having different browsers for each test. This prevents one test from messing with another (like a failed login). Tests can even start with a pre-logged-in state, skipping login steps and saving you time also Some websites remember your login or settings (like shopping carts). Playwright can help manage this in your tests by saving and reusing saved cookies with the help of Playwright's setCookies method
Below is an example of how to save and reuse cookies.
const playwright = require('playwright')

;(async () => {
  // Launch a Chromium browser instance
  const browser = await playwright.chromium.launch()
  const context = await browser.newContext()

  // Login logic
  await context.goto('https://example.com/login')
  await context.fill('#username', 'your_username')
  await context.fill('#password', 'your_password')
  await context.click('#login-button')

  // Capture cookies
  const cookies = await context.cookies()

  // Save cookies (optional)
  const fs = require('fs')
  fs.writeFileSync('cookies.json', JSON.stringify(cookies, null, 2))

  // Reuse cookies in another test
  const anotherContext = await browser.newContext()
  await anotherContext.addCookies(cookies)
  await anotherContext.goto('https://example.com')

  await browser.close()
})()
Managing Flaky Tests and Continuous Improvement
Flaky tests are tests that produce inconsistent results without any code changes. They can significantly impact team confidence in automated testing. Here's how to identify, manage, and fix flaky tests:
Identifying Flaky Tests
// playwright.config.js - Configure retries for flaky test detection
module.exports = {
  // Retry failed tests up to 2 times
  retries: process.env.CI ? 2 : 0,

  // Generate reports to track flaky tests
  reporter: [['html'], ['json', { outputFile: 'test-results.json' }]],
}
Common Causes and Solutions
// ❌ Flaky: Race conditions with network requests
test('Flaky test example', async ({ page }) => {
  await page.click('[data-testid="load-data"]')
  await expect(page.locator('[data-testid="data-list"]')).toBeVisible() // May fail
})

// ✅ Stable: Wait for specific conditions
test('Stable test example', async ({ page }) => {
  await page.click('[data-testid="load-data"]')

  // Wait for network request to complete
  await page.waitForResponse((response) => response.url().includes('/api/data'))

  // Wait for specific element state
  await expect(page.locator('[data-testid="data-list"]')).toBeVisible()
  await expect(page.locator('[data-testid="data-item"]')).toHaveCount(5)
})
Flaky Test Monitoring
// scripts/flaky-test-report.js
const fs = require('fs')

function analyzeTestResults() {
  const results = JSON.parse(fs.readFileSync('test-results.json', 'utf8'))

  const flakyTests = results.suites
    .flatMap((suite) => suite.specs)
    .filter((spec) => spec.tests.some((test) => test.results.length > 1))

  console.log('Flaky Tests Detected:')
  flakyTests.forEach((test) => {
    console.log(`- ${test.title}: ${test.results.length} attempts`)
  })
}

analyzeTestResults()
Conclusion
Mastering Playwright for web automation requires a comprehensive approach that goes beyond basic test writing. By implementing these best practices, you can build a robust, maintainable, and efficient test automation framework:
Framework Foundations:
- Use Page Object Model (POM) for better code organization
- Implement fixtures for reusable setup and teardown
- Leverage data-driven testing with JSON files
- Secure sensitive data with environment variables
Test Quality and Reliability:
- Keep tests isolated and independent
- Use proper waiting mechanisms instead of hard sleeps
- Implement smart locator strategies with data-testid
- Focus on critical user journeys and smoke tests
Performance and Efficiency:
- Parallelize test execution for faster feedback
- Use test tagging for selective execution
- Implement proper test data cleanup strategies
- Configure screenshot and video capture for debugging
Continuous Improvement:
- Monitor and fix flaky tests regularly
- Maintain readable and well-documented code
- Integrate tests into CI/CD pipelines
- Use comprehensive reporting tools like Allure
Key Takeaways:
- Prioritize test stability over speed
- Automate repetitive tasks through fixtures and helpers
- Keep tests simple, focused, and maintainable
- Invest time in proper framework setup for long-term benefits
By following these practices, your Playwright test suite will become a powerful tool that provides fast feedback, catches bugs early, and gives your team confidence in software releases. Remember, good test automation is an investment that pays dividends in reduced manual testing effort and improved software quality.
Stay updated with the latest Playwright features and best practices. The Playwright team constantly evolves the framework, offering new features and improvements. Utilize the official documentation for the most current information.
Happy Testing and Automation!